No products in the cart.


So we are always looking for fun and easy tricks to change up our layouts or add that extra something to fun layout we are creating! This week I did a quick tutorial on extracting me and my race friends from a photo and then adding a white stroke around it to give it a more cartoon comic effect.
Follow along with the image tutorial and see if you can find a picture or a layout that you can use this on!
If you have any questions on parts, please post them and I will answer them here or re-edit the first post to include the answers!
Have fun playing!
You can click on the images to be taken to a larger version if you want to see the details of where things are!
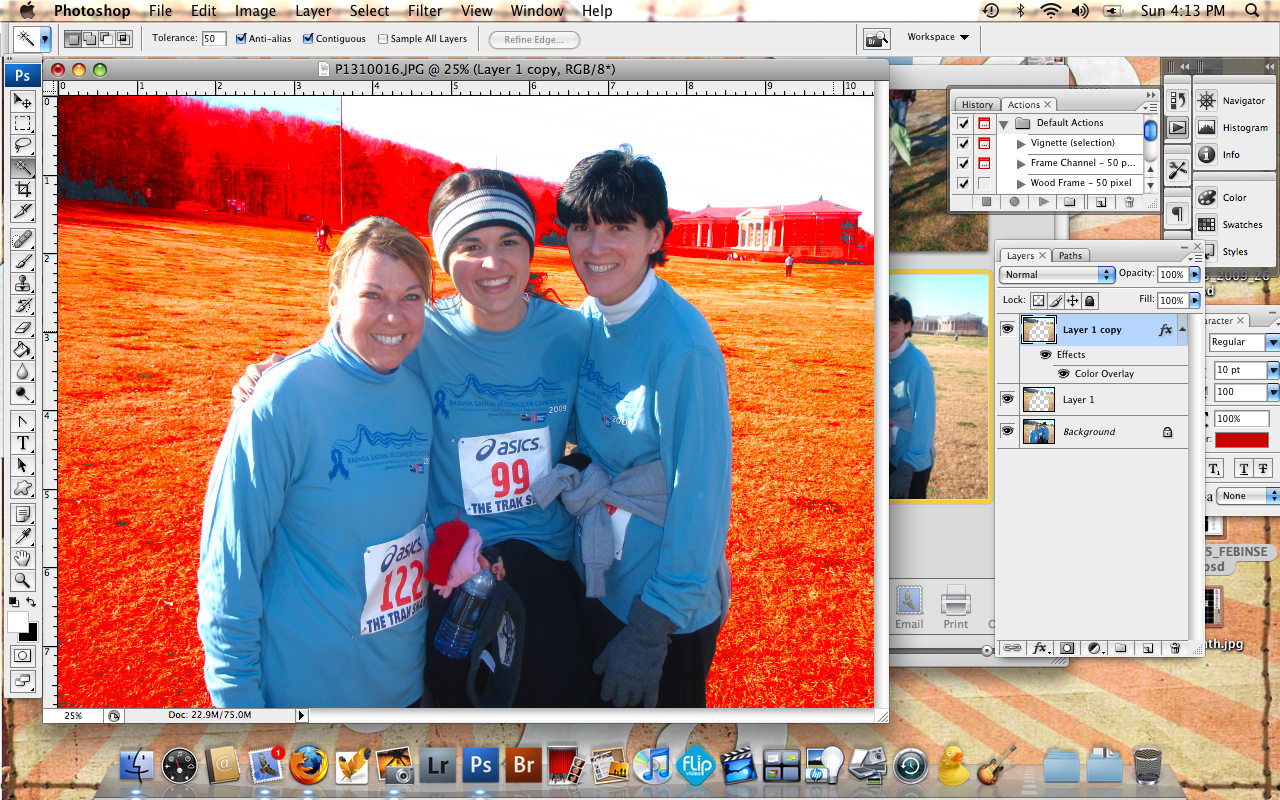
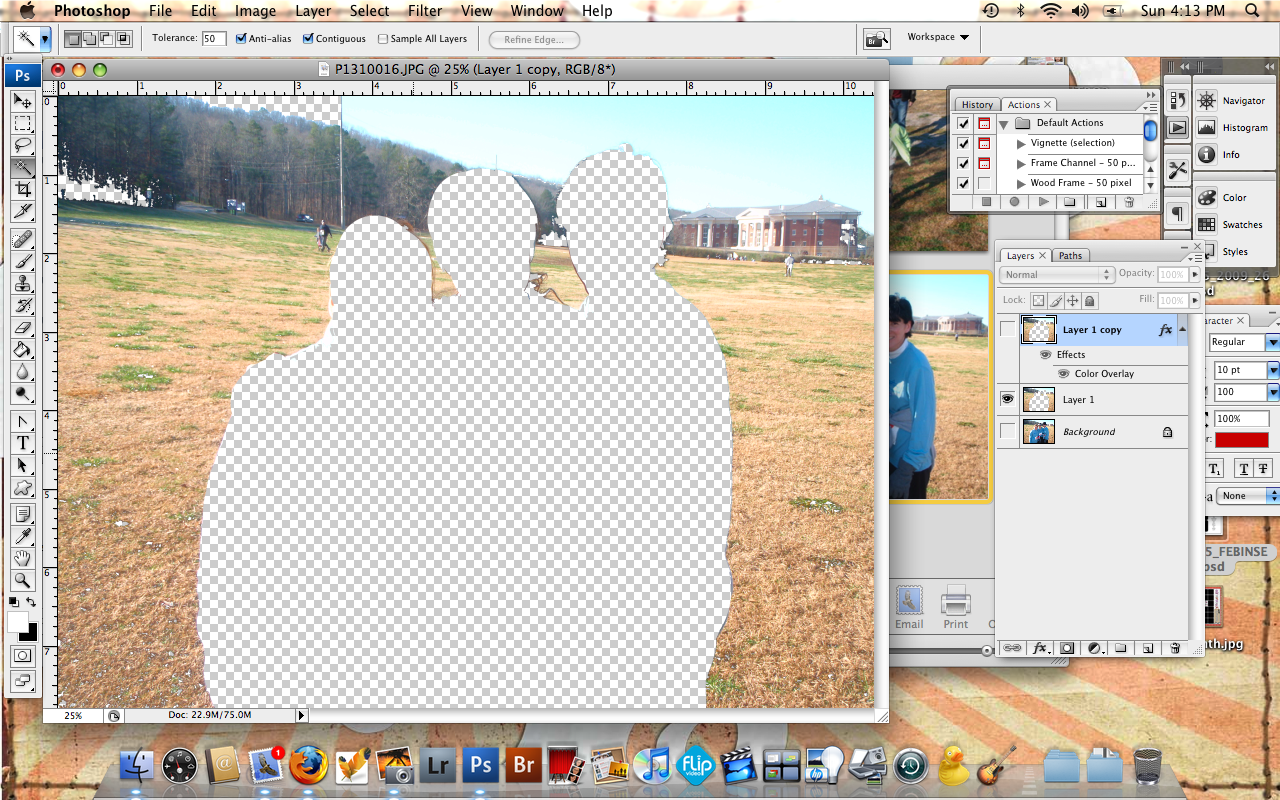
I first used the magic wand tool to take out the grass, sky, mountain background…I got it close to all selected but it also selected some of our faces…I went ahead and copied what I had magic wanded and then went to that layer and used the eraser to erase out our faces since we wanted to have those in the final image!

this shows the layer above the photo that I am left with…I want all this gone!
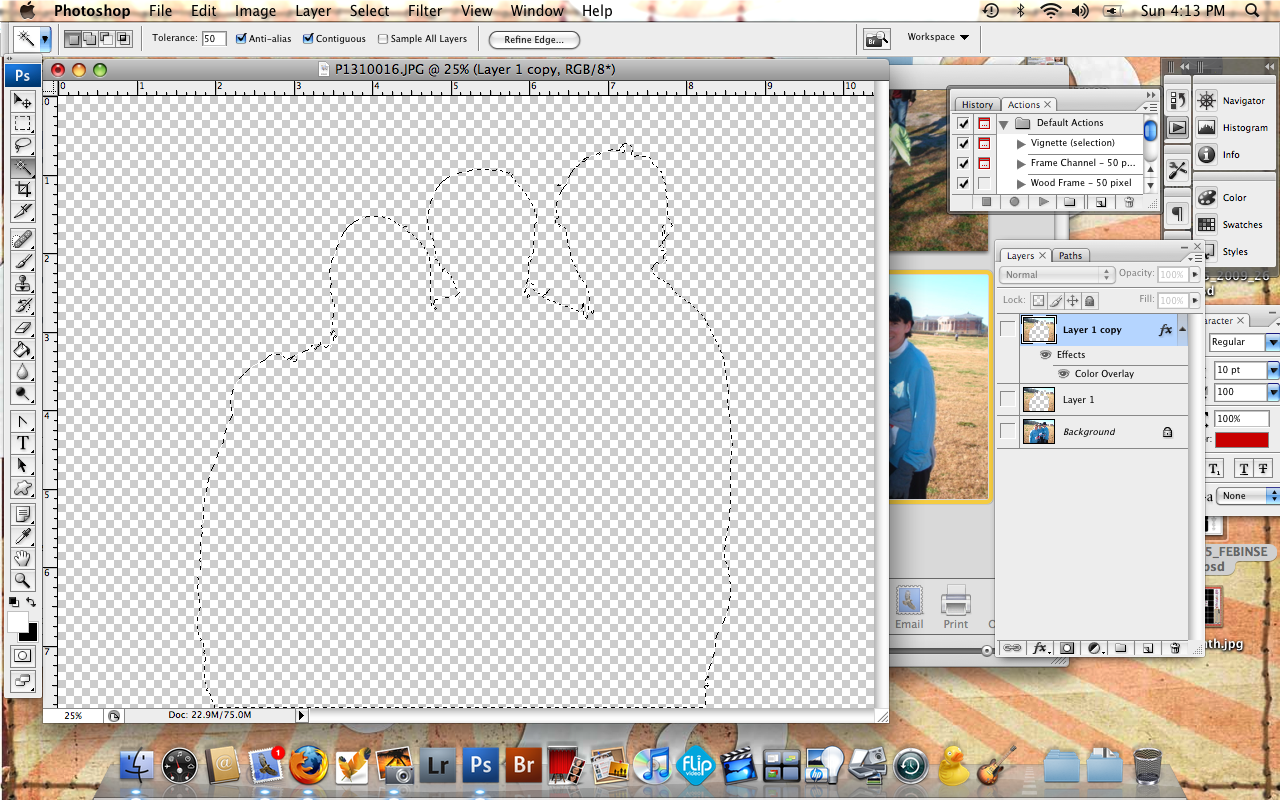
easy enough…now I can use my magic wand tool in that blank section ( I turned off my bottom layer so I could see what I had cut off ) now I use the wand and grab that blank space where we were. After I do that I can turn off that layer too and see just the running ants of the section I want to now cut out of the original image.
If you ever think you have the ants around what you want and it ends up being the opposite… go here to Select Inverse and that will give you the opposite and you are set!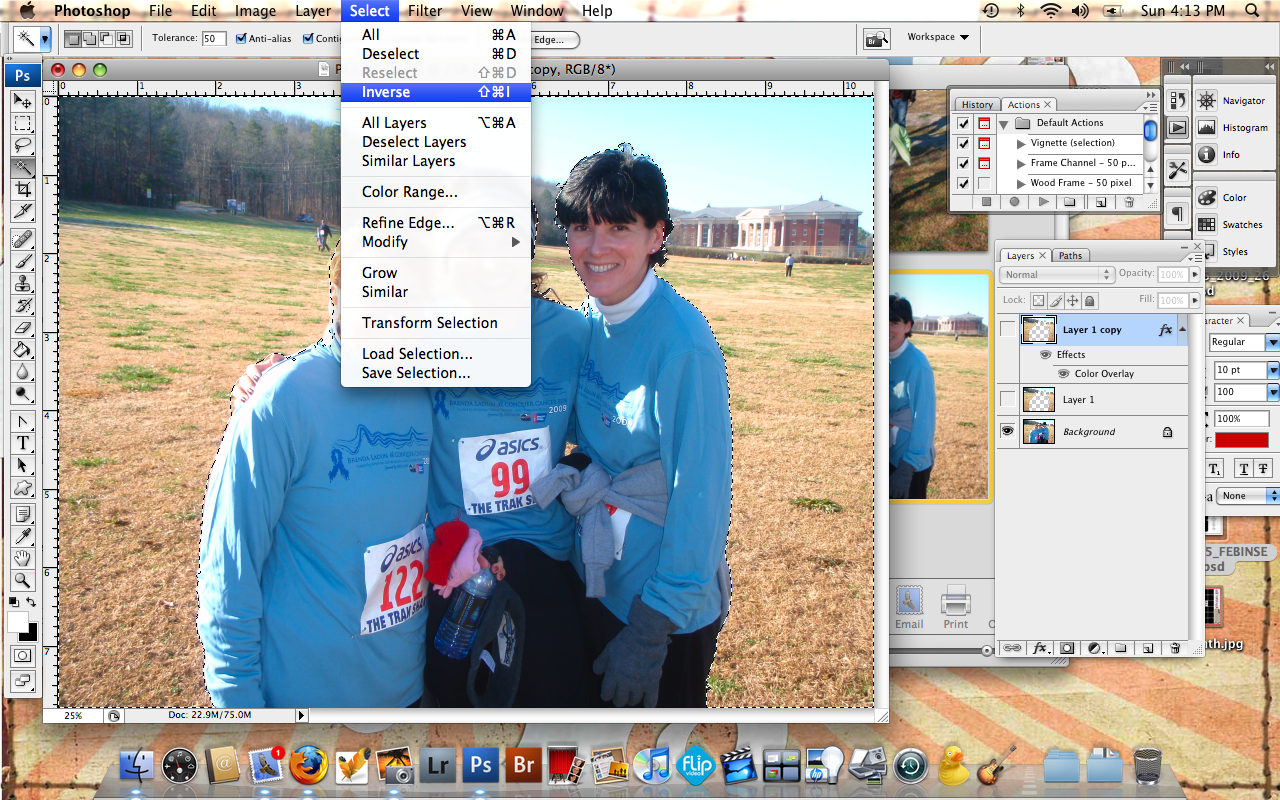
once I had the right part selected I can do Command J or copy from the original first layer… that will give me just the blank portion I had been working on..now me and my friends are just standing in the middle of no where….I could add any background I want.
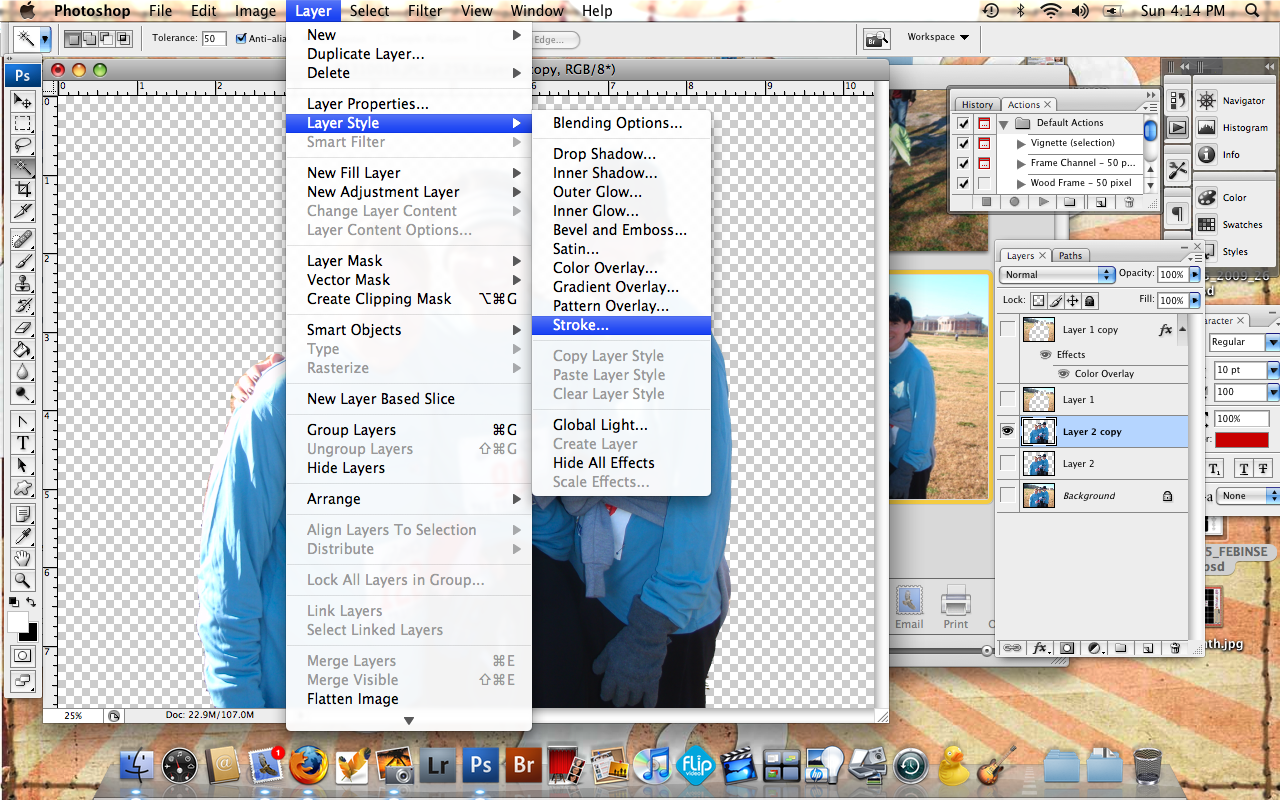
look at the image above to get the commands for adding a stroke ( I added the white stroke ) around us to give it a stand out different effect.
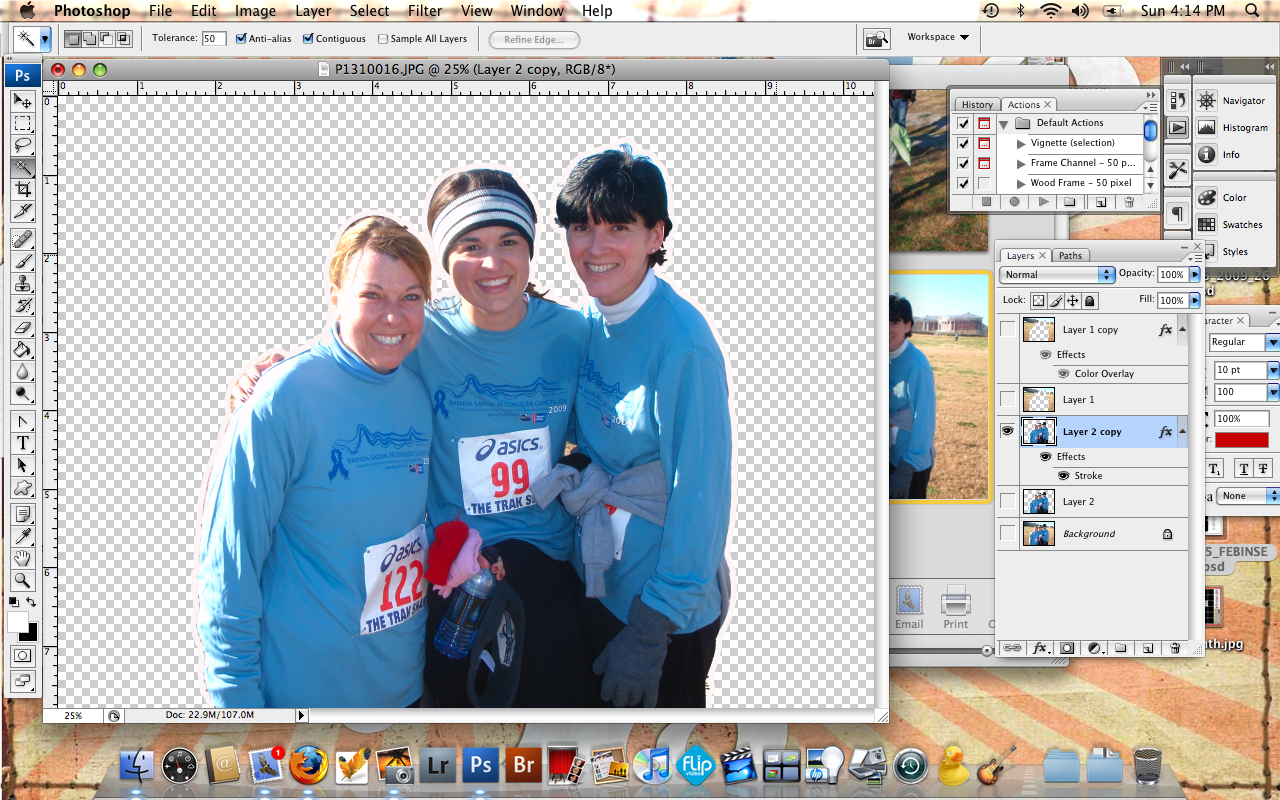
see if I turn back on the background layer we have the white tracing (stroke) around us!

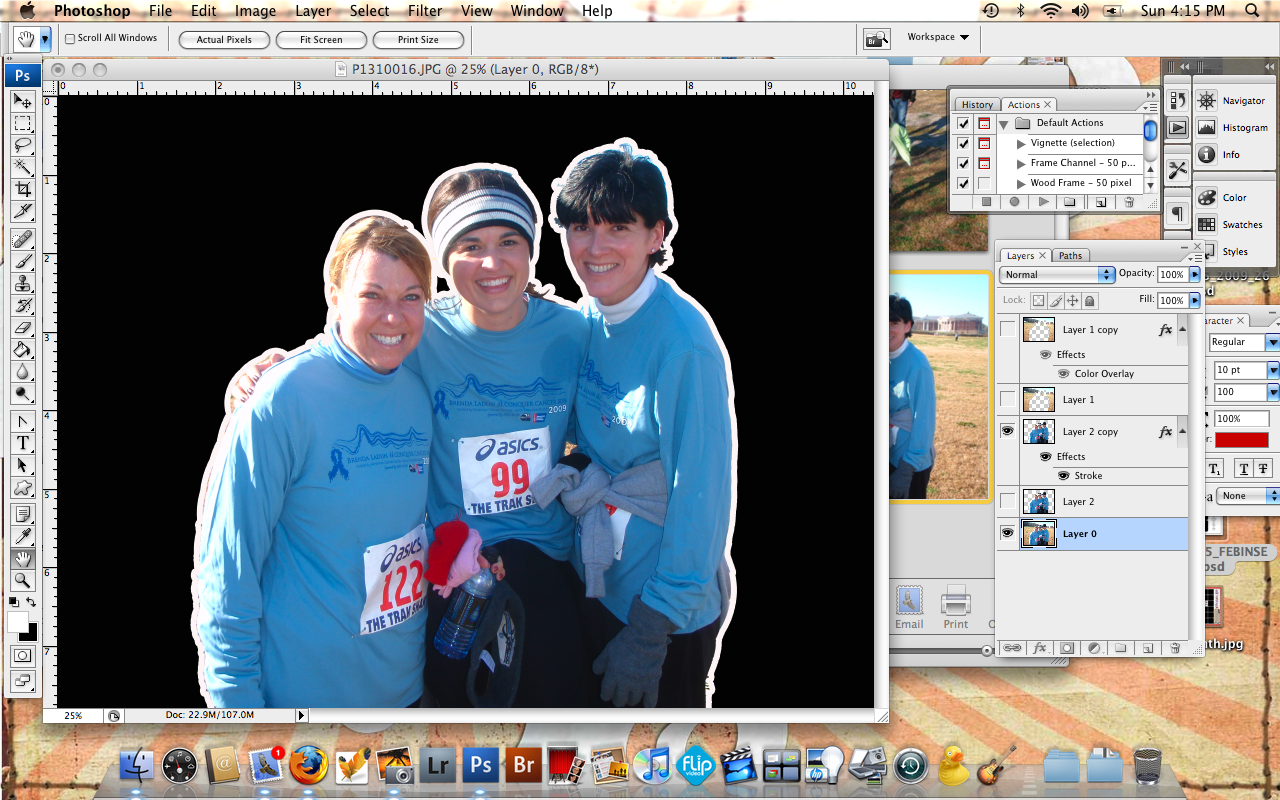
from here you can drag that layer into a layout or cover your background layer with a solid color overlay (here I did black) and then do something fun and artsy! Just a random goofy digi trick but easy enough for all of us to do!
I hope you have fun playing! Ask any questions you have or give suggestions for future weeks…no idea is to basic…we really want to help any and all scrappers have fun and achieve the digi look they want! You can do it!!!
(((hugs)))

6 Comments on “Tuesday Tips, Tricks and Tutorials- Extract and Stroke a Picture”
Darline @ AZ
February 3, 2009 at 12:11 pmI can’t wait to try that!! Thanks!!!
Gina Marie
February 3, 2009 at 8:17 pmGreat tutorial, Tee, thanks so much!!
xo!
Laurie
February 4, 2009 at 1:46 pmGreat tutorial! Thank you so much! 🙂
Megan
February 6, 2009 at 12:19 amCool! Thank you! I would love to see how you used this in an actual layout!
C. Wang
February 6, 2009 at 8:51 amI’m magic-wanding like a million times. I have a picture of a person sitting on a couch that has a lot of dots in the fabric. When I magic-wand the couch, the couch disappears, but then ALL the dots are still there and I have to magic wand EACH of them.What am I doing wrong?
Tee
February 6, 2009 at 9:33 amyou have to magic wand each color and you can hold shift while you click them to isolate them all together…..if the dots aren’t near your people though I would just use your eraser on those once they are away from what you want to keep…let me know if that works at all 🙂